
If you’ve ever cooked a pot of soup and thought, “Hmm… it’s good, but it’s missing something,” that “something” was almost certainly homemade chicken stock. Making your own stock is like discovering a cheat code for cooking: soups become silkier, sauces gain depth, and even plain rice suddenly tastes like something a chef made “with intention.”
And the best part? It is shockingly easy. Like… so easy you’ll question why you’ve been buying those sad little cartons from the grocery store. And no judgment—we’ve all been there.
This guide will walk you through everything: pressure cooker and stovetop methods, roasted vs. delicate stock, vegetable options, using all those chicken parts you weren’t sure what to do with (yes, including the feet!), and how to chill and store your liquid gold safely. You’ll even get ideas for how to use your stock—both the everyday ways and the impress-your-dinner-guests ways.
Hint: Making stock is the best way to make use of ingredients that are left-over. Never let that farmers market produce go to waste! Get it in some stock.
Let’s make stock. You’re about to feel extremely accomplished.
Why Make Your Own Chicken Stock?
Besides bragging rights? Because:
1. It tastes worlds better.
Store-bought stock is fine, but homemade is chef’s kiss good. Richer, cleaner, more chicken-y.
2. It uses parts you normally toss.
Carcasses, wing tips, backs, necks, gizzards, feet—those bits your whole chicken arrives with but you never know what to do with. Into the pot they go! Zero waste. Gold star.
3. It's cheap.
You can literally make a luxurious, silky stock from scraps.
4. It freezes beautifully.
Future you is going to love past you.
5. It deepens everything you cook.
Soups! Risotto! Sauces! Gravy! Reduce it down into a faux “demi-glacé” if you want to feel fancy.
Basically, you’re about to level up.
6. It's universal.
You may have seen options for beef and/or veal stock. Beef stock is typically too strong for most applications and leaves a strong beefy flavor. Veal stock is hard to find, expensive, and for some is controversial in practice. Chicken is easy to find, inexpensive, and by playing around with roasting versus non-roasting options you can create a wide range of stocks that can replace the beef and veal options. By experimenting with the gentle varieties that omit roasting to the deep-in-flavor and rich-in-color roasted options you can get all you need from the common bird.
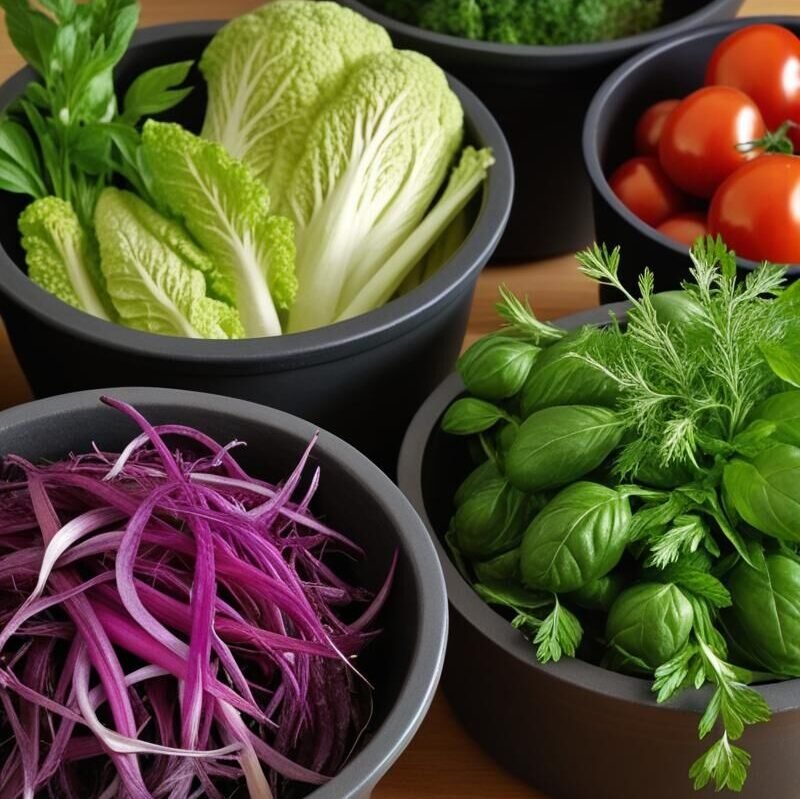
Vegetables: What to Add (and Why)
Vegetables provide sweetness, aroma, and backbone. But the type of stock you're making influences which veg route you choose:
Option A: Roasted Vegetables (for a dark, rich stock)
Use when you want something hearty and deeply flavored.
Vegetables for roasting:
Carrots (halved lengthwise)
Onions (halved, skin on for extra color)
Celery
Leeks
Garlic
Mushrooms (these add umami)
A small dab of tomato paste—rubbed on the vegetables before roasting. This caramelizes and adds depth, color, and magic.
Option B: Fresh Vegetables (for a delicate, light stock)
Use for chicken noodle soup, consommé, poaching broths, or anything “clean tasting.”
Vegetables for delicate stock:
Onion or leek
Carrot
Celery
Parsley stems
Garlic (optional)
A bay leaf
NO tomato paste here—keep it gentle.
Chicken Parts: What to Use
You have options, and all are excellent:
Whole chicken carcasses
The leftover frame from a roasted chicken is perfect.
Wings
Wings have tons of collagen = natural thickening power.
Feet (yes, really)
Chicken feet are gelatin bombs. Add a handful and your stock becomes gloriously silky.
Necks, backs, and the “mystery bag” of parts inside a whole chicken
Gizzards? Yes. Neck? Yes. Liver? No—it makes the stock bitter. Save the liver for sautéing or pâté.
Rotisserie chicken leftovers
You paid for the whole bird; use the whole bird! Don't toss that Costco left-over, throw it in a pot and get some extra bang for your buck.
Mix and match as you like.
Optional but Absolutely Game-Changing Step: Roast the Chicken Parts First
Roasting creates richer, darker, more savory stock.
Just toss chicken parts onto a sheet pan, optionally with your vegetables, and roast at 425°F (220°C) until they’re deeply browned—about 35–45 minutes.
If a French chef were here, they would whisper the word “fond” reverently. You are building fond.
Hint: If you roast, please de-glaze! And with wine. Ideally a Pinot Grigio or Sauvignon Blanc. After you remove the roasted chicken, heat the sheet pan, then pour a little wine and scrape up the brown bits with your wooden spoon. Add that golden deliciousness right into your stock pan!
The Recipes: Pressure Cooker + Stovetop
We’ll start with the pressure cooker method because it is absurdly easy.
Pressure Cooker / Instant Pot Chicken Stock (90 Minutes to Glory)
Ingredients
2–3 lb chicken parts (carcass, wings, backs, feet, necks—any combo)
1–2 carrots, chunked
1–2 celery stalks
1 onion or leek, chunked
Optional aromatics: parsley stems, thyme, 2–3 garlic cloves, bay leaf, peppercorns
Optional roasted version:
Roast chicken parts + veg + rub a spoonful of tomato paste onto veg before roasting.Add water to cover. Now this is a personal preference. If you add just enough water to cover you'll get a more gelatinezed stock (this is desirable!). If you add water to the max line but that is more water than you have 'stuff' the stock will be lighter. This isn't exact science. Add more chicken/veg to keep it richer, or add more water to get more volume. You'll find out what you like.
Instructions
Load the pot.
No need to be precious about it. Just pile everything in.Cover with water.
Fill to about 1 inch below the max line, or see the note about water above.Cook on HIGH PRESSURE for 45 minutes.
If your machine has a “Soup/Broth” button, go wild.Natural release for at least 20 minutes.
The pressure drop extracts extra collagen. That's the good stuff!Strain.
Pour through a fine mesh strainer. Do not press the solids or your stock may get cloudy.Cool quickly (see the safety section below).
Refrigerate overnight.
The fat will rise and solidify—remove it if you like. And I do recommend you remove it, and then use it on roasted veggies. No waste here! Try it and thank me later.
You'll notice this option doesn't include skimming like the stovetop. That's one of major benefits of this method. It's why I use this option most of the year. But I'm not going to lie - the stovetop method and skimming produces a slightly better version. It isn't noticeable until my mom is coming over for the holidays so really that's the only time I resort to stovetop methods.
Time Total: About 1.5–2 hours
Flavor payoff: Enormous.
Stovetop Chicken Stock (The Classic, Cozy Method)
Ingredients
Same as above.
Instructions
Add chicken parts + vegetables to a large stockpot. Ok, I'm going to get a little specific on you if you want. If you add the chicken first and let that come to a boil and then simmer it's easier to skim the scum. After about 45 minutes of skimming then add your vegetables and herbs and finish. But it really doesn't matter - you do you.
Fill with cold water until ingredients are covered by 1–2 inches.
Bring to a bare simmer over medium heat.
Gentle is key—rolling boiling = cloudy stock. To be specific - bring to a boil and then reduce to a simmer. Seeing the first bubbles indicates you've reach the right heat, reducing to simmer so you only see slight bubbles keeps it at the right heat and eliminates the cloudiness.Simmer 3–4 hours.
For an ultra-rich version, go 5–6. I'm going to be honest, I never go that long with chicken stock. I'm convinced after 3 hours I've reached max flavor but you won't know until you try it. When it tastes good to you - you're done.Skim occasionally to remove foam. No seriously, and see my note above about skimming. Skim that scum off your precious golden liquid. And do it frequently. You'll notice with the pressure cooker method there is no skimming - that's the shortcut. Stovetop is going old school your grandmas version and it generates scum that you need to get outta there. But this step does produce a better stock.
Strain, cool quickly, refrigerate.
Time Total: 3–6 hours
Flavor payoff: Deep, hearty, smells like a Norman Rockwell painting.
How to Cool Stock Quickly and Safely
Chicken stock is a big warm liquid blob—perfect bacteria conditions if left to cool slowly. Here’s how to cool it safely:
Ways to chill rapidly:
Ice bath: Place the pot or bowl into a larger bowl of ice water. Stir occasionally.
Divide into smaller containers to increase surface area.
Add a few sanitized “ice cubes” of frozen stock if you already have some from previous batches (this trick feels very chef-y).
Stock should reach room temperature within 1 hour, then go straight into the fridge. No cheating on this one!! Get that stuff cooled down quick.
Storage
Get your stock into the refrigerator and leave it there until the fat forms on the top. Then it's easy to remove (and see my note above using it for no waste!). After that get it into the containers you want to use for storage.
Refrigerate: Up to 5 days
Freeze: Up to 6 months (some stretch to 12)
Freeze in:
Quart containers
Ice cube trays (great for sauces)
Silicone muffin cups (perfect ½-cup portions)
Zip-top bags laid flat for easy stacking
- My personal favorite - mason jars. I keep tons of them around. I put stock into 1 cup, 2 cup, and 16oz options so I can thaw just what I need for each recipe. Mason jar glass is sturdy, can take the cold and the heat, and makes me feel better using less plastic.
How to Use Your Glorious Homemade Stock
Everyday uses:
Chicken noodle soup
Risotto (total game-changer)
Pan sauces
Gravy
Stews
Matzo ball soup
Braising liquid
Cooking rice, quinoa, or farro
Fancy uses to impress guests (or yourself):
Reduce it by half for an instant sauce base
Reduce by 75% for faux “demi-glacé”
(Yes, you can use chicken stock instead of veal/brown beef stock—many chefs do! Go for the roasted option on this one)Add to pan drippings for a quick chicken jus
Use it to enrich roast chicken, pork tenderloin, or even steak
If you reduce deeply, it becomes glossy, syrupy, and restaurant-level delicious.
Final Encouragement
Homemade chicken stock is one of the friendliest kitchen projects you can do. There are no precision measurements, no timing stress, no technique you can mess up unless you leave it boiling violently or forget the lid on the pressure cooker (don’t do that).
Use scraps, use veggie odds and ends, use the feet if you dare, roast if you feel like it, skip roasting if you don’t. It will still taste better than anything you can buy.
And once you taste the difference, you’ll never go back.
Fresh, golden, flavorful stock is one of life’s small, reliable joys. And now you know exactly how to make it.

Homemade Chicken Stock
Ingredients
Equipment
Method
- Load the pot.
- No need to be precious about it. Just pile everything in.
- Cover with water.
- Fill to about 1 inch below the max line, or see the note about water above.
- Cook on HIGH PRESSURE for 45 minutes.
- If your machine has a “Soup/Broth” button, go wild.
- Natural release for at least 20 minutes.
- The pressure drop extracts extra collagen. That’s the good stuff!
- Strain.
- Pour through a fine mesh strainer. Do not press the solids or your stock may get cloudy.
- Cool quickly (see the safety section below).
- Refrigerate overnight.
- The fat will rise and solidify—remove it if you like. And I do recommend you remove it, and then use it on roasted veggies. No waste here! Try it and thank me later.
- Add chicken parts + vegetables to a large stockpot. Ok, I’m going to get a little specific on you if you want. If you add the chicken first and let that come to a boil and then simmer it’s easier to skim the scum. After about 45 minutes of skimming then add your vegetables and herbs and finish. But it really doesn’t matter – you do you.
- Fill with cold water until ingredients are covered by 1–2 inches.
- Bring to a bare simmer over medium heat.
- Gentle is key—rolling boiling = cloudy stock. To be specific – bring to a boil and then reduce to a simmer. Seeing the first bubbles indicates you’ve reach the right heat, reducing to simmer so you only see slight bubbles keeps it at the right heat and eliminates the cloudiness.
- Simmer 3–4 hours.
- For an ultra-rich version, go 5–6. I’m going to be honest, I never go that long with chicken stock. I’m convinced after 3 hours I’ve reached max flavor but you won’t know until you try it. When it tastes good to you – you’re done.
- Skim occasionally to remove foam. No seriously, and see my note above about skimming. Skim that scum off your precious golden liquid. And do it frequently. You’ll notice with the pressure cooker method there is no skimming – that’s the shortcut. Stovetop is going old school your grandmas version and it generates scum that you need to get outta there. But this step does produce a better stock.
- Strain, cool quickly, refrigerate.


0 Comments