
How to Make Refrigerator Pickles at Home (No Canning, No Special Equipment, Just Really Good Pickles)
Refrigerator pickles require no canning equipment and are ready in 24 hours. Here is the brine ratio, the flavor add-ins, and the one prep step that keeps them crisp.
 1 min read
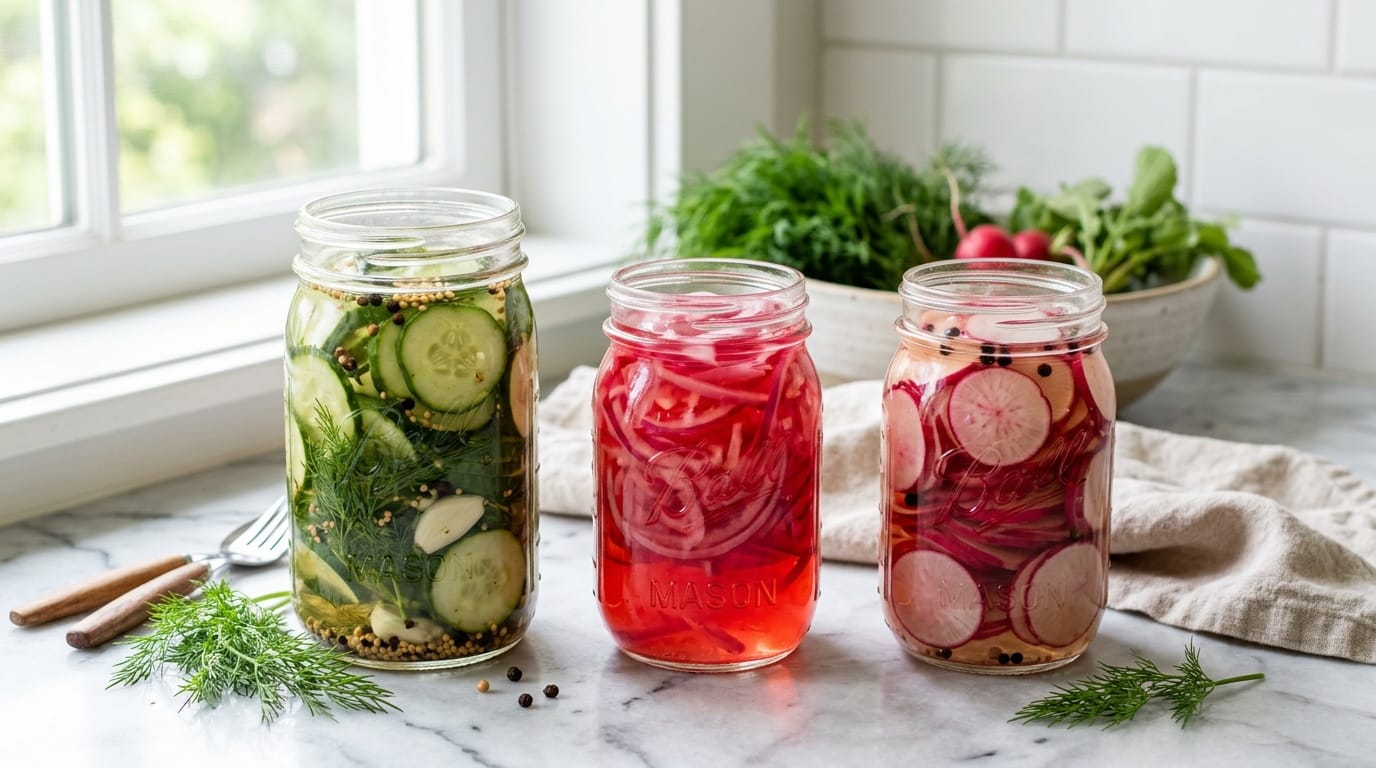
There is a persistent myth in the kitchen that pickles require special equipment, three hours of a Saturday, and a water-bath canning setup that takes over your entire counter. Refrigerator pickles would like to dispute this myth firmly because they require none of those things and can be ready to eat tomorrow morning. This is the technique worth knowing whether you are a farmers market shopper making the most of your summer haul, a home cook who just discovered what six cucumber plants actually produces, or a cottage food vendor exploring quick-preservation methods. Fast, forgiving, and genuinely delicious.
What Makes a Refrigerator Pickle Different
Traditional canning creates shelf-stable pickles through heat processing that eliminates harmful bacteria and creates a vacuum seal, which is why canned pickles can sit in your pantry for two years. Refrigerator pickles skip the heat processing entirely. They rely on a brine of vinegar, water, salt, and sugar plus the cold of your refrigerator to preserve and flavor the vegetables. They are not shelf-stable and must stay refrigerated, but they are ready in as little as 24 hours and will keep for 2 to 4 weeks in the fridge.
The Basic Brine Ratio That Works Every Time
The foundation of any refrigerator pickle: 1 cup distilled white or apple cider vinegar, 1 cup water, 1 and a half tablespoons kosher salt, 1 to 2 tablespoons granulated sugar. Heat in a small saucepan until the salt and sugar dissolve completely, then cool slightly before pouring over your prepared vegetables. This ratio works for cucumbers, radishes, red onion, carrots, green beans, jalapenos, and cauliflower. White vinegar is sharp and clean, apple cider vinegar is mellow and slightly fruity, rice wine vinegar is the most delicate.
The Flavor Add-Ins That Make Them Yours
Classic dill: fresh dill sprigs or dill seed, whole garlic cloves, black peppercorns, red pepper flakes if you like heat.
Bread and butter style: increase the sugar to 3 to 4 tablespoons, add a pinch of turmeric for that golden color, mustard seed, thin slices of sweet onion.

Spicy and bold: sliced fresh jalapeno or serrano, fresh garlic, cumin seeds, a bay leaf.
Asian-inspired: substitute rice wine vinegar for half the vinegar, add a tablespoon of sesame oil to the cooled brine, sliced fresh ginger, and red pepper flakes.
The Prep Step That Keeps Them Crisp
Toss cucumber slices with a teaspoon of kosher salt, let them sit for 30 minutes, then rinse well and pat thoroughly dry before packing into jars. This draws out excess moisture and keeps your pickles firm and snappy rather than waterlogged and soft. Most quick-pickle recipes skip this step and wonder why their pickles are mushy. Slice cucumbers between one eighth and one quarter inch thick. Thin slices pickle faster and more evenly.
Time, Patience, and the Overnight Magic
Refrigerator pickles are technically edible after a few hours, but 24 hours is when they really become pickles. The flavor develops, the brine penetrates, and the balance of sweet, sour, and salty clicks into place. The ideal window is day one through day fourteen for maximum crunch and flavor. They will keep up to four weeks in the refrigerator, though the texture gradually softens after the second week. Pack your vegetables tightly into clean glass jars, pour the warm brine over the top, let the jar cool to room temperature, then refrigerate. Tomorrow you will have pickles. It really is that simple.
Beyond Cucumbers: What to Quick-Pickle This Summer
Once you have the brine ratio memorized, everything at the farmers market becomes a potential pickle. Watermelon radishes turn a stunning magenta-pink in vinegar brine. Quick-pickled red onions transform sandwiches, tacos, grain bowls, and salads. Pickled green beans called dilly beans are a farmers market classic that takes about 15 minutes of active work. The principle is identical every time. The vegetables change. The results are always worth the minimal effort. Your summer haul has never been in more capable hands. Go pickle something.

Keep reading
More from the market
How to Make Stock from Your Market Scraps (The Free Ingredient in Your Freezer)
A bag in the freezer, filled with onion ends and carrot tops, becomes the best ingredient in your kitchen for free. What…
Read more
How to Roast Any Vegetable (One Method, Your Whole Market Haul)
One temperature, one pan, three rules that decide everything. Timings for the whole fall market table, and the crowding mistake that steams…
Read more
How to Grill Summer Vegetables (Eggplant, Zucchini, Peppers & More)
Grilling turns a farmers market vegetable haul into the best part of dinner. Here's how to grill eggplant, zucchini, peppers, and onions…
Read more